3 minutes
Presenting with Jupyter Notebooks
The best way to walk through this tutorial is using the accompanying Jupyter Notebook:
![]()
-
In the last year I’ve started presenting work using Jupyter Notebooks, rebelling against the Bill Gates'-driven status-quo. Here I’ll explain how to do it. It’s not difficult, but in my opinion makes presentations look slicker, whilst allowing you to run code live in a presentation if you like. First, we need to download the plug-in that gives us the presentation functionality, it’s called RISE. We can do this easily using pip in a terminal window:
pip install RISE
Once installed, our first move is to add the presentation toggles to our notebook cells. We do this by clicking View in the menu bar, then Cell Toolbar, then Slideshow:
Adding Presentation Toggles to Cells
Slide Types
This adds a Slide Type dropdown to each cell in the notebook. Here we can choose one of five options:
- Slide: Used to start a new chapter in your presentation, think of this as a section heading in LaTeX.
- Sub-slide: Slide falling within the chapter defined by a Slide cell.
- Fragment: this is to split the contents of one slide into pieces; a cell marked as a fragment will create a break inside the slide; it will not show up right away, you will need to press Space one more time to see it.
- Skip: Skips cell when in presenter mode.
- Notes: Cell that allows the author to write notes on a slide that aren’t shown in presenter view.
As with any notebook, we can define the cell type to be either Markdown or Code. As you’d expect, we present any text or image-based slide in Markdown, reserving the Code cell type if and only if we want to explicitly run some code in the presentation. If you aren’t familiar, Markdown is a straightforward language for text formatting; I won’t go into the details here, but suffice to say you can learn the basics of Markdown in 5 minutes. You can find a useful cheatsheet here.
Images
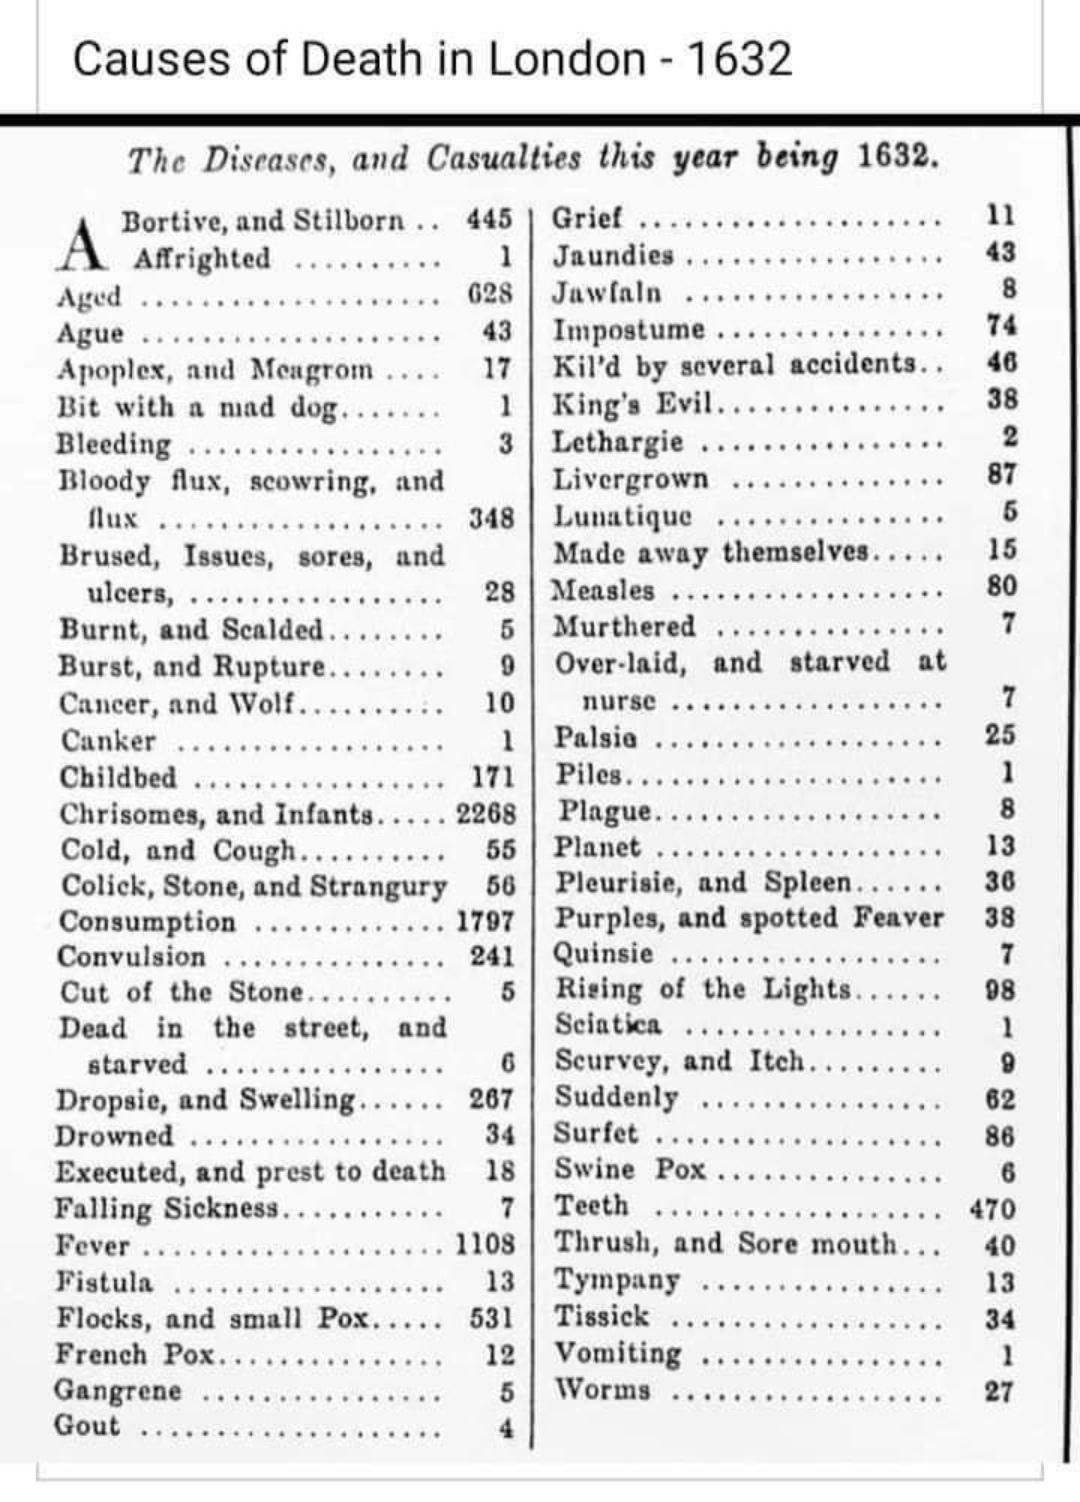
Adding images is easy too. I advise creating a sub-directory in your working directory called /images and storing anything you want to present there. Then you display them in a markdown file using some simple HTML syntax:
<img class="" src="images/london_deaths.jpeg" style="width:75%">
You can manipulate the style attribute to change the size of the image. Don’t worry, this is the only HTML you need to know!
Entering Presentation Mode
To view your slideshow click on the bar-chart button in the menu bar. This will start the presentation from the cell currently selected:
That’s it! This tutorial has given you an introduction to the basics of RISE for presenting with Jupyter Notebooks, you can of course customise these to your heart’s content using further plug-ins and more advanced Markdown. Here’s a summary of the useful links from this document to finish: